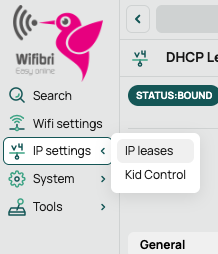
IP Settings
Through IP settings → IP leases, you can view an overview of all devices that have currently received an IP address from the WiBiBox.
The screenshots shown may differ in appearance or colours from your actual setup, but they correspond to the same functionality and location within the web interface.
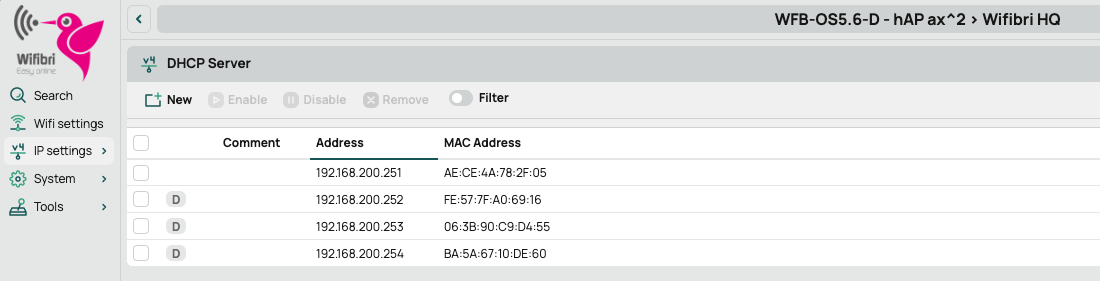
Overview of Connected Devices
The overview displays all devices that have currently received an IP address from the WiBiBox.
For each device, the following information may be displayed:
- IP address
- MAC address
- Comments (if configured)
- Lease type (dynamic or static)
Dynamic IP Addresses
By default, devices automatically receive an IP address from the WiBiBox DHCP server.
These addresses may change when a device reconnects or when the lease expires.
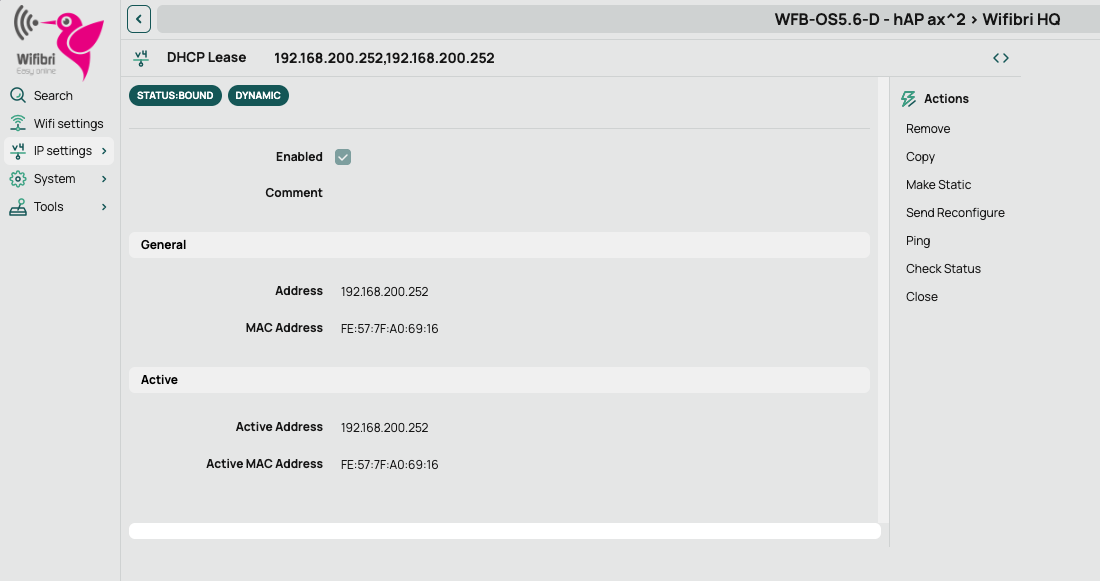
Viewing Lease Information
Click on a device in the list to view the lease details.
For a dynamic lease, you can view information such as:
- The assigned IP address
- The device MAC address
- Active lease information
- The current connection status
Several actions are also available, including:
- Ping
- Make Static
Assigning a Static IP Address
For some devices, it may be useful to always use the same IP address. Examples include:
- Network printers
- NAS systems
- Smart IoT devices
Selecting Make Static converts a dynamic lease into a static lease.
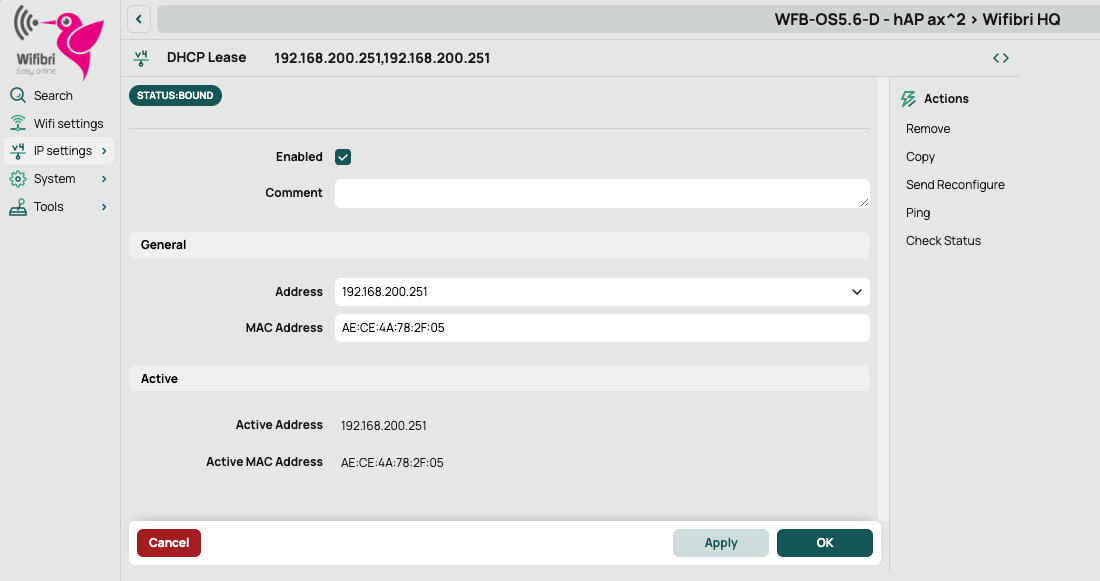
With a static lease, you can:
- Add a description (Comment)
- Modify the IP address
- View the MAC address
- Save the configuration
When Should You Use a Static IP Address?
A static IP address ensures that a device always receives the same IP address whenever it connects to the WiBiBox.
For most users, this is not necessary. The automatic DHCP configuration is sufficient in nearly all situations.
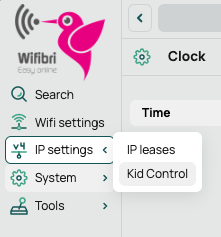
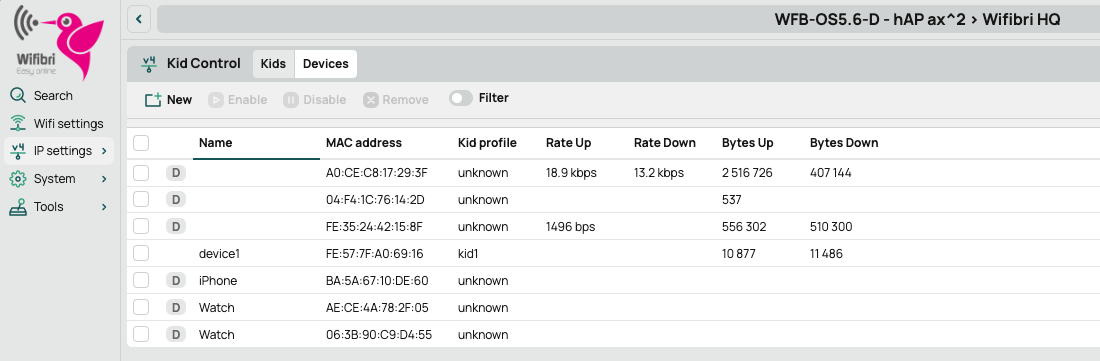
Kid Control
With Kid Control, you can link devices to a schedule. This allows internet access to be automatically permitted or blocked during specific hours of the day.
You can find this feature under IP settings → Kid Control.
The screenshots shown may differ in appearance or colours from your actual setup, but they correspond to the same functionality and location within the web interface.
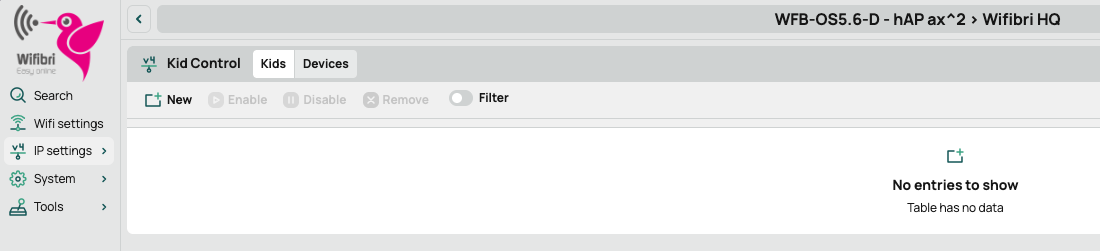
Overview
Kid Control consists of two sections:
- Kids: create and manage schedules.
- Devices: link devices to a schedule.
Creating a Schedule
Open the Kids tab and click New.
Give the profile a recognisable name and configure the allowed internet access hours for each day.
One or more time periods can be configured per day.
Using the + button, you can add additional time periods for the same day. This is useful when internet access should only be available during specific periods.
Example:
- 07:00 - 08:00 (before school)
- 16:00 - 21:00 (after school)
Use the - button to remove a time period.
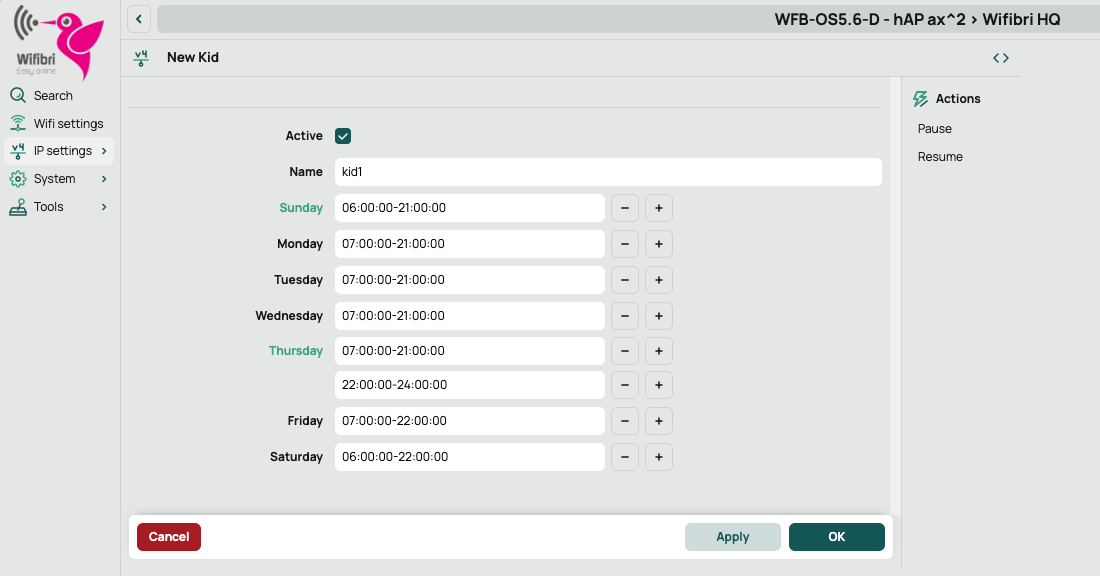
Click OK to save the profile.
Schedule Overview
All configured schedules are displayed in the Kids tab.

When a profile is selected, additional actions become available on the right-hand side.
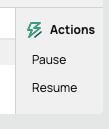
Available actions:
- Pause: temporarily disable the schedule.
- Resume: reactivate a paused schedule.
Linking a Device to a Schedule
Open the Devices tab.
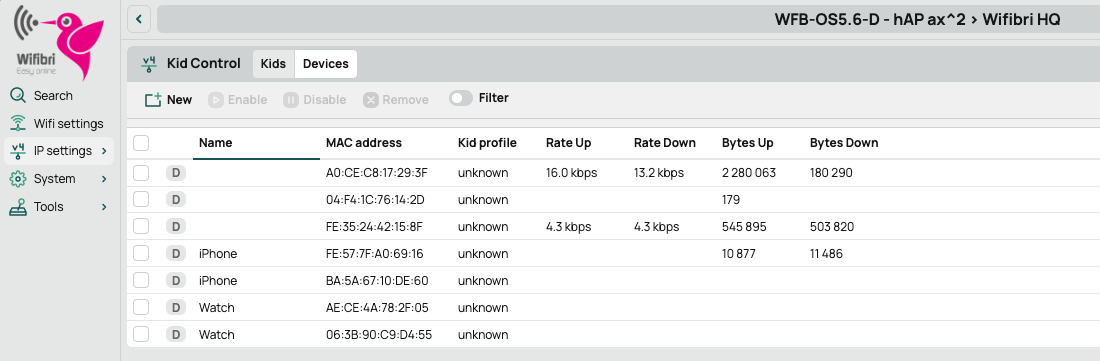
This list contains all devices currently known to the WiBiBox.
Select the device you want to link and open its details.
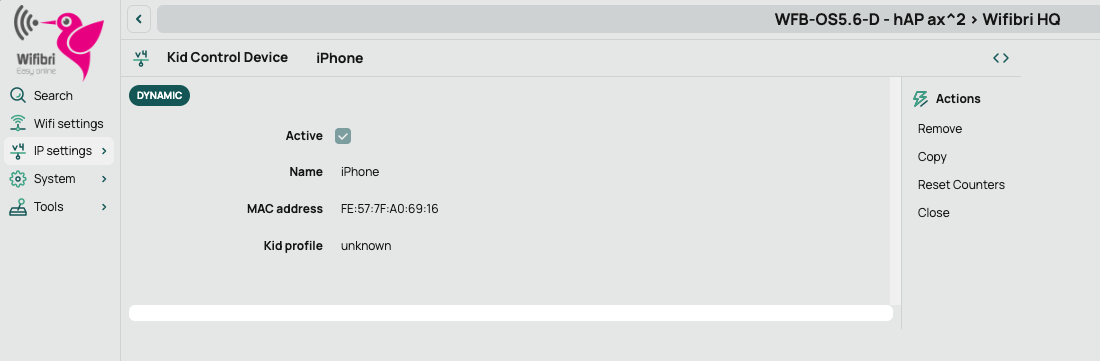
An action menu will appear on the right-hand side.
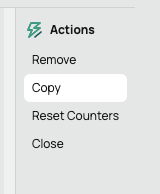
Click Copy to create a new Kid Control rule based on the selected device.
A new configuration screen will automatically open with the MAC address already filled in.
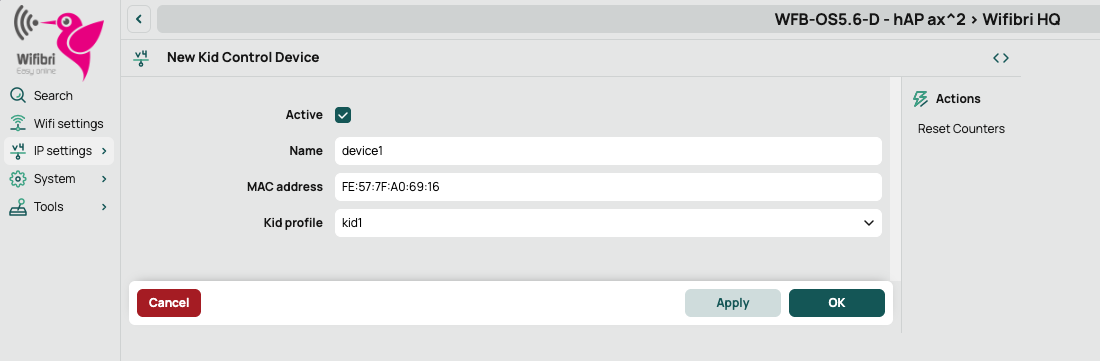
Optionally give the device a recognisable name and select the desired Kid profile.
Then click OK to save the configuration.
Linked Devices
Once a device has been linked to a profile, it will appear in the overview.
From that moment on, the WiBiBox will automatically apply the configured schedule to that device.
Important
Kid Control only works for devices that are directly connected to the WiBiBox.
If a device attempts to access the internet outside the configured time periods, internet access will automatically be blocked according to the selected schedule.